Who
Sean Durbin
Sean started growing his sourdough starter 4 years ago and has been making delicious bread ever since.
History of the sourdough starter by Sean: My sourdough starter is almost four and a half years old. I like telling its history because it’s bound up in how I ended up moving to Sydney and starting my PhD. In 2008, while I was living in Wellington, I came to Sydney to see some friends of mine for a holiday. One of my favourite lecturers, Marion Maddox, from my time as an undergraduate had recently moved to Sydney to take up a job at Macquarie University. I emailed Marion to see if I could stop by the university and say hi. As she’d moved, I had to search online to find her new email address, and one of the things that turned up in my Google search was an article in a New Zealand magazine called The Listener, which featured a story about Marion’s own sourdough and a recipe for English muffins.
The article intrigued me so I made the muffins using commercial yeast—mainly for fun, but also because I realized that although she had been one of my favourite teachers, we hadn’t ever actually had many long conversations, and I thought the recipe would be useful to get the conversation going again in the event we hit a lull.
From memory, it wasn’t long until I started talking about my first foray into English muffin territory… In the midst of the conversation, provided me with two pieces of advice: One was that I ought to make my own sourdough rather than rely on commercial yeast. The other was that I should apply for a scholarship to do my PhD with her in Sydney.
When I returned to Wellington I did both, and ended up returning to Sydney in 2009 with both a scholarship and little jar of starter that fortunately made it through quarantine, and which remains in my fridge today.
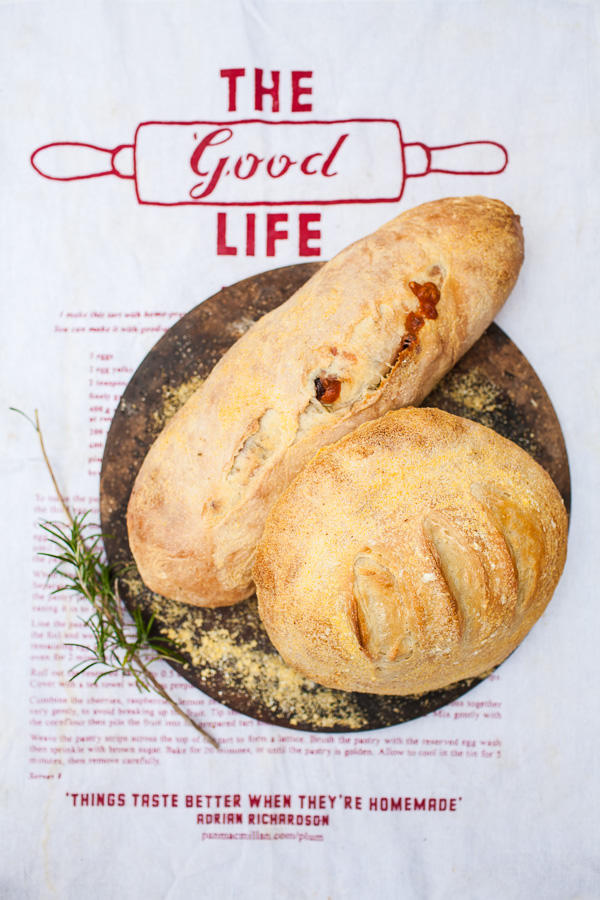


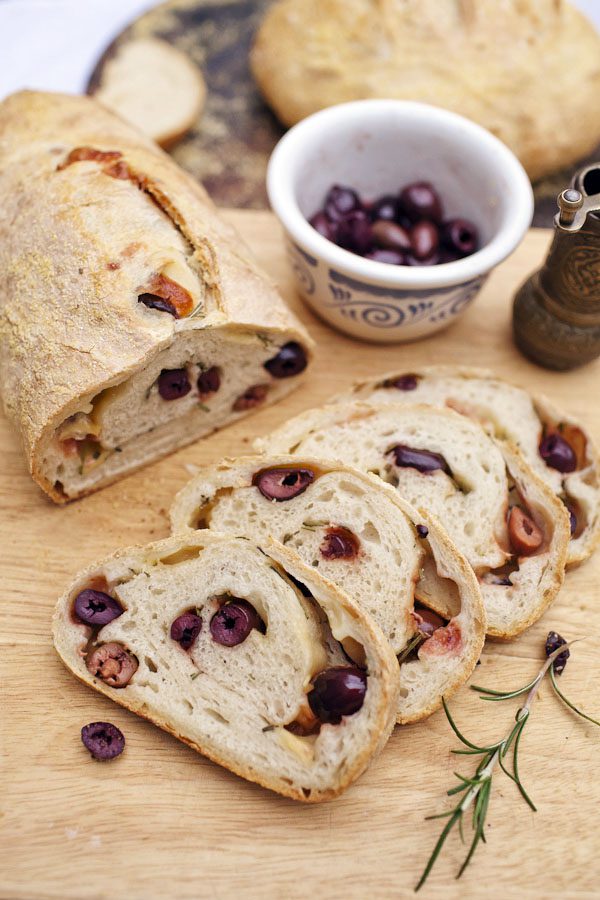
This dough mix makes 2 loaves – one plain and one with toppings.


- Who: Sean Durbin
- Home is: Redfern
- Family origin: New Zealand/USA
- I can’t live without my: Books and kitchen knives
- Occupation: PhD Candidate
- Dream job: Professor
- Childhood taste: Macaroni and cheese
- I will always have in my pantry: Salt
- The one place I must visit: My Aunt and Uncle’s house in New Zealand during the holidays
- Go to meal: Leek and potato soup
- 3 Unforgettable meals: 1. Roti Chennai, Satay Kingdom, Wellington; 2. First meat pie, Wairarapa, New Zealand; 3. Deep fried catfish with jalapeño corn bread and macaroni and cheese, Memphis, Tennessee
- Perfect night in/out: In – Cooking dinner for my friends. Out – Eating dinner and drinking beer with my friends
- My piece of Sydney: My house
- I do my groceries at: local supermarket and veggie shop around the corner
- Guilty pleasure: Terrible movies
- Who does the dishes: Whoever doesn’t cook

Spray the dough as soon as it goes in the oven and then every ten minutes or so during baking.
While baking the crust that begins to form on dough can make it harder for the loaf to rise. Spraying the oven and dough with water creates steam. This keeps the outer skin of the loaf moist and flexible, and helps it rise to its maximum volume with a good shape. Steam also encourages starch granules on the surface of the loaf to fully gelatinize, which gives the crust its crispy texture.


Basic White Sourdough Bread (adapted from Northwest Sourdough)
Prep time: | Cook time: | Serves 10
- 2 cups sourdough starter at 166% hydration (starter is fed with 1 cup water and one cup flour for 166% hydration)- 18oz/510g
- 1 ¾ cups water – 14oz/397g
- 1 – 2 tablespoon of oil
- 6 ½ – 7 ½ cups flour (depending on how wet you want the dough)
- 5 teaspoons salt
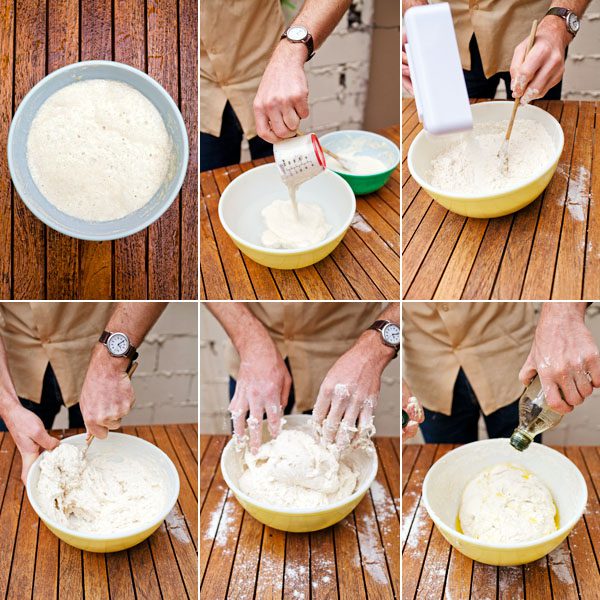
- Add the starter to the bowl. Mix with water, oil. Mix with 7 cups of flour.
- Once you have the ingredients in the bowl, mix the dough for about 2 to 3 minutes, then let sit for 20 minutes to autolyse.
- To autolyse dough means to leave the salt out of the dough until after it has been mixed and allowed to set for a while. This resting time allows the gluten strands to absorb water and the enzymes to go to work to condition the dough.
- Autolysis will produce a better, more open crumb. If you want to autolyse try leaving the salt out until the dough has rested 20 minutes. It is also easier to incorporate the salt to the dough if you leave the last cup of flour out and add it at the same time as the salt, that way you can adjust the flour amount if the dough seems too dry.
- After 20 minutes, mix the dough for about one more minute (The total mixing time should never be more than five minutes). Pour a little more olive oil over the dough to prevent it from sticking to the bowl. Now let the dough bulk ferment (this is the term used for the first raising of the dough while it is still in it’s bulk form). Bulk fermentation is variable depending on what your sourdough starter’s proof is. In cool weather, it can safely sit over night. In warmer weather, though, it is better to let it sit for a few hours untl you can poke it with your finger and the dough doesn’t bounce back immediately.
- Allowing the dough to bulk ferment or proof too long will cause the gluten to start breaking down and the dough to get “gluey”. When you bake overfermented dough it will spread apart, have a ghostly whitish color and look glazed like porcelain, it will also be dense.
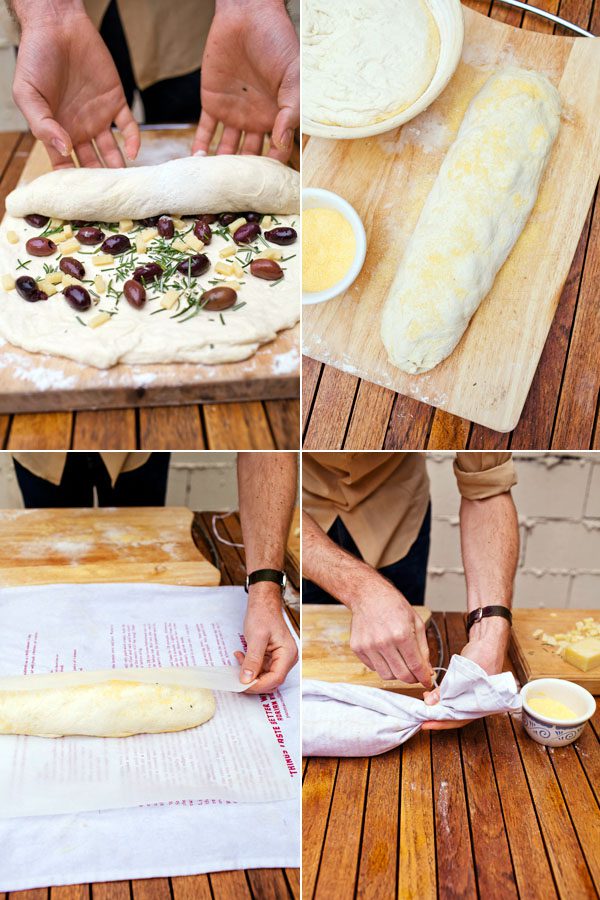
- When the dough is completely done bulk fermenting, Push the dough down in the bowl until it is deflated, then pour the dough out on the table, which has been sprinkled lightly with flour, and knead it just enough to gather into a ball. Then divide the dough in half or thirds,and shape each one into the the general form you wish it to be- (boule,batard,baguette,etc).
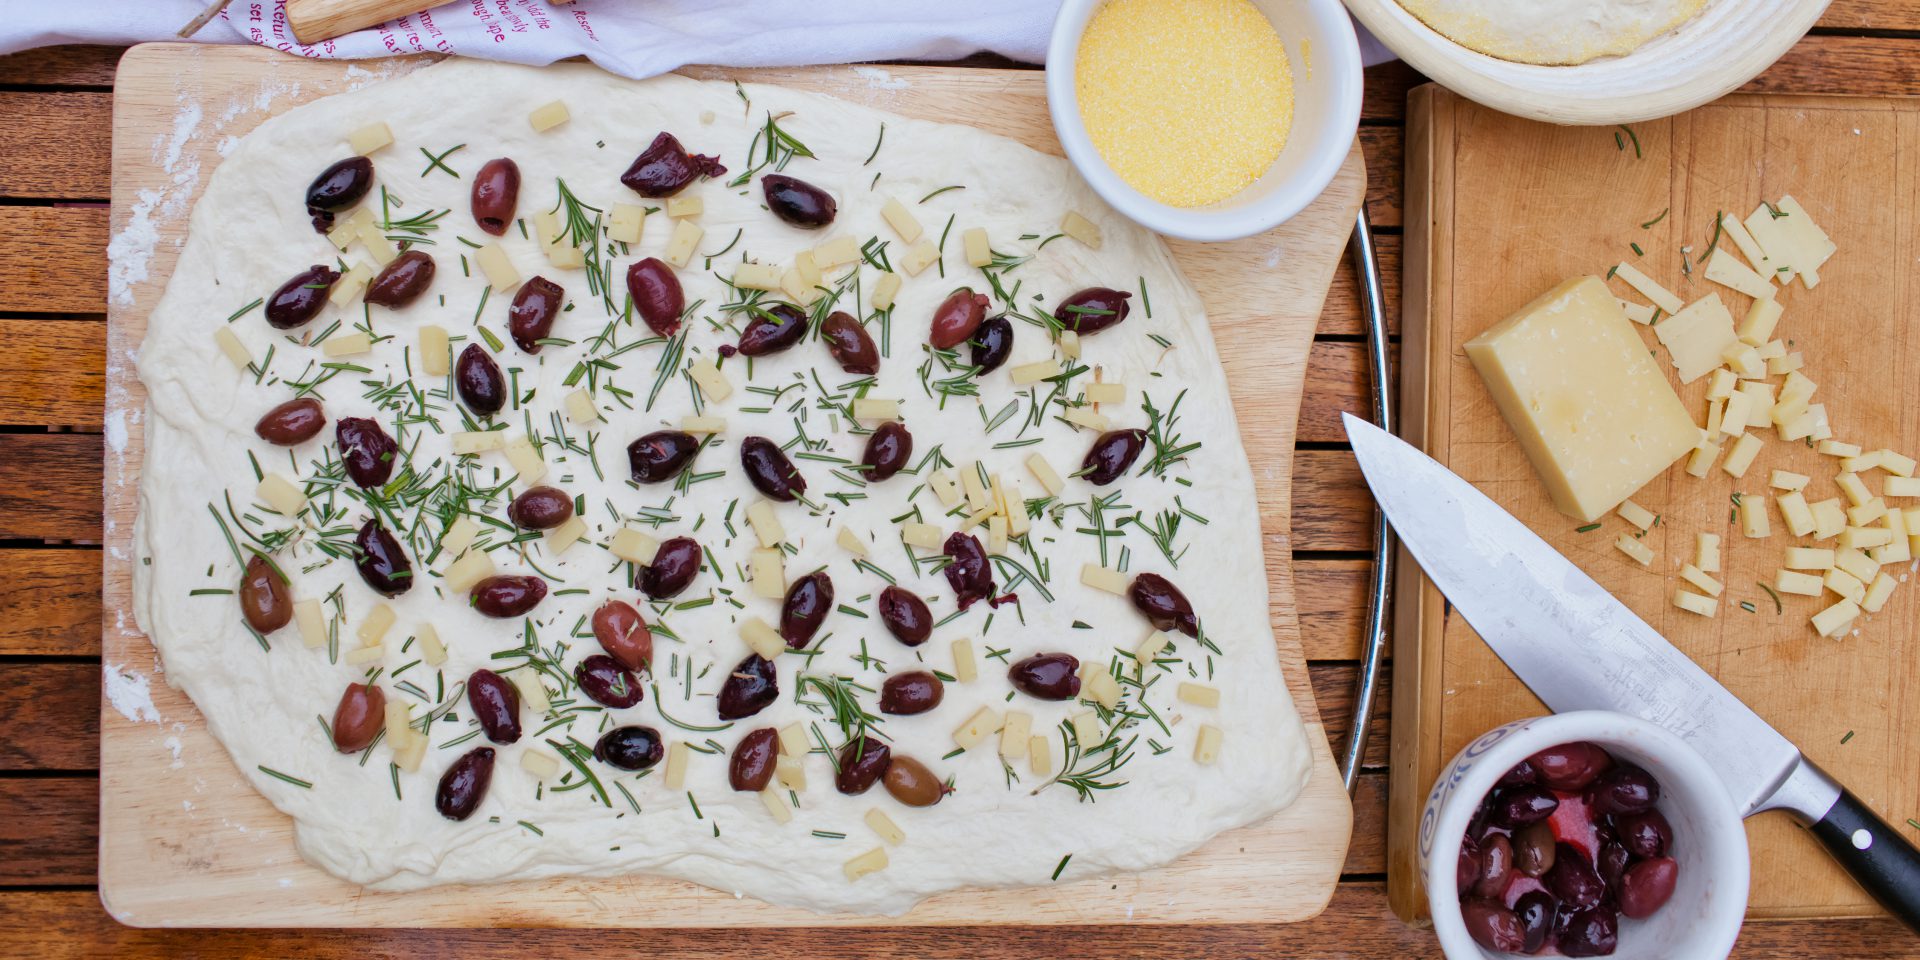
- For the Rosemary, olive, and Parmesan loaf: Follow this recipe, roll out half of the dough into a flat, rectangular shape. Sprinkle the flat surface evenly with olives, rosemary, and Parmesan. Roll the dough like a scroll, and let it rise again. Using a floured tea-towel as we’ve done here will help it maintain its shape while it rises.
- Bake the bread for 35-45 minutes at 250 degrees Celsius. Turn the loaf around half way through baking so that it browns evenly. While baking the crust that begins to form on dough can make it harder for the loaf to rise. Spraying the oven and dough with water creates steam. This keeps the outer skin of the loaf moist and flexible, and helps it rise to its maximum volume with a good shape. Steam also encourages starch granules on the surface of the loaf to fully gelatinize, which gives the crust its crispy texture. When the loaf is golden brown and sounds hollow when knocked with a wooden spoon, it should be ready.